How To create a custom form action |
This article provides the possible ways to add a custom action to an item's form.
The easiest way to provide a custom action is to add a button in the form using Packflow Designer.
The button will be available in a section of the form and triggers a server-side action in the corresponding controller.
- Open the application's model.
- Open the form of your content-type.
- Right-click on a section block.
- Click "Add button".
Fill the dialog:
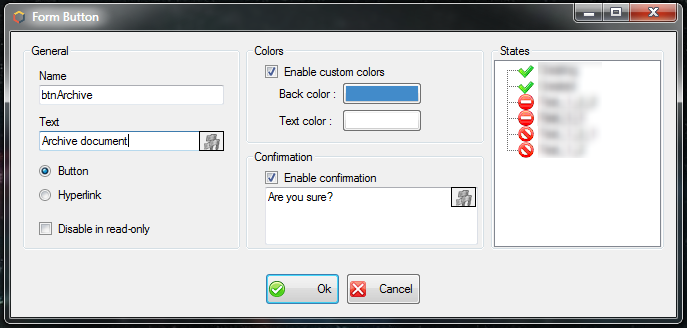
- Name: the internal name is used to represent the button in the code but will also impact the name of the Controller event.
- Text: the button's label.
- Type: defines how your button is displayed.
- Form mode: if checked, the button will not be clickable if the form is not in edit mode.
- Colors
- Confirmation: if enabled, the user will have to confirm his action in a prompt displaying the specified message.
- States: specifies if the button should be enabled, disabled or hidden depending on the current state of the item. Note: this can be customized later in the Html Helper code.
Once the button created and your project generated from Designer, open your content-type's controller in Visual Studio. You will find a new action corresponding to your button.
[HttpPost]
[AcceptVerbs(HttpVerbs.Post)]
public ActionResult btnArchive_Click(Document item, FormCollection collection)
{
    //Add you custom code here

    return GetDefaultViewResult(item);
}
The forms' actions bar can be customized using the corresponding Html Helper.
To do so, you must apply your changes to the PFActionsBar object (representing the definition of the bar that will be generated) passed in the overridable CustomizeActions method.
This allows to change or even remove certain generic actions from the bar at will.
But let's focus on the creation of a new action.
An action can be added on the first level of the bar or in a sub menu. The following code shows how to do both:
public override void CustomizeActions(PFActionsBar actionsBar)
{
    base.CustomizeActions(actionsBar);

    //Create a controller button
    PFActionsBarButton btnArchive = PFActionsBarButton.GetControllerButton("btnArchive",
        PFImagesHtmlHelper.FA_Archive, "Archive document", "btnArchive_Click");

    //First possibility - Add the action at the first level
    actionsBar.Objects.Add(btnArchive);

    //Second possibility - Add the button to the menu
    PFActionsBarMenu moreActions = actionsBar.GetMenu(PFActionsBar.StandardMenuName_MoreActions); //Get the generic More Actions menu
    moreActions.Buttons.Add(btnArchive);

    //Third possibility - Add the button to a new menu
    PFActionsBarMenu documentMenu = new PFActionsBarMenu("documentMenu", "Document", btnArchive); //Create a new menu containing the button
    actionsBar.Objects.Add(documentMenu);
}
The button's type is not limited to a controller action:
- Controller: calls an action on the content-type's controller.
- JavaScript: calls a JavaScript function. E.g a function added in a custom part of the form.
- Url: redirects to the specified address.
public override void CustomizeActions(PFActionsBar actionsBar)
{
    //Create a Controller button
    PFActionsBarButton btnArchive = PFActionsBarButton.GetControllerButton("btnArchive",
        PFImagesHtmlHelper.FA_Archive, "Archive document", "btnArchive_Click");

    //Create a JavaScript button
    PFActionsBarButton btnShowSection = PFActionsBarButton.GetJavascriptButton("btnShowSection",
        PFImagesHtmlHelper.FA_Chevron_right, "Show section", "showSection();");

    //Create an Url button
    PFActionsBarButton btnSeeReport = PFActionsBarButton.GetUrlButton("btnSeeReport",
        PFImagesHtmlHelper.FA_Bar_chart, "See report", String.Format("/Pages/MyApp/Report?Id={0}", CurrentObject.Id));

    //Add the actions at the first level
    actionsBar.Objects.Add(btnArchive);
    actionsBar.Objects.Add(btnShowSection);
    actionsBar.Objects.Add(btnSeeReport);
}
Finally, various options are available: hidden/visible, enabled/disabled, you can also set a tooltip and a confirmation message:
public override void CustomizeActions(PFActionsBar actionsBar)
{
    //Create a Controller button
    PFActionsBarButton btnArchive = PFActionsBarButton.GetControllerButton("btnArchive",
        PFImagesHtmlHelper.FA_Archive, "Archive document", "btnArchive_Click");
    btnArchive.Enabled = true;
    btnArchive.Visible = true;
    btnArchive.ConfirmationSettings = new PFActionsBarConfirmationSettings
    {
        BodyContent = "Are you <b>sure</b>?",
        ButtonText = "Apply",
        ButtonColor = "#0f9215",
        HeaderContent = "Confirmation"
    };
    btnArchive.TooltipText = "This will definitely archive your document!";
    btnArchive.Tooltip_Mode = PFActionsBarButtonTooltipMode.Persistent;

    //Add the actions at the first level
    actionsBar.Objects.Add(btnArchive);
}
A part is an element of a content-type form that can be filled with custom HTML and JavaScript code.
Two types of part are available:
- HTML Part: the content is defined directly in the model and inserted runtime in the form depending on the language.
- Page Part: the content is defined in the Visual Studio project, inside an ASPX file generated in the Parts folder. A page part can be referenced in multiple forms.
To add a new part in a form:
- Open the application's model.
- Open the form of your content-type.
- Right-click on a section block.
- Click "Add part".
Fill the dialog:
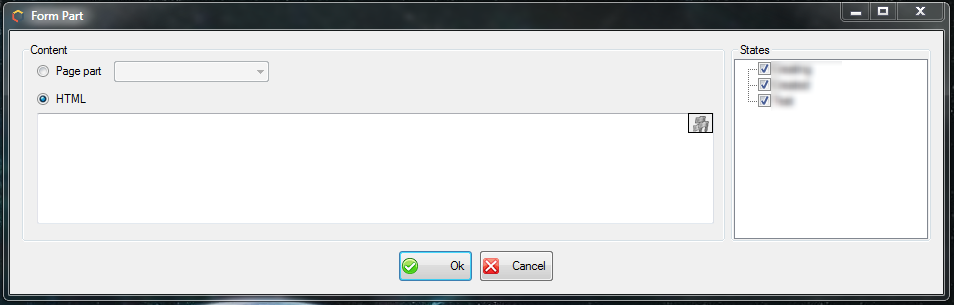
For a page part, select the corresponding part to include. Page parts can be created under the model node.
For an HTML part, it's obvious.
The states box determines if the part should be visible or hidden depending on the current state of the item. Note: this can be customized later in the Html Helper code
These parts allow to insert any kind of buttons, links and actions using markup and client-code. But it's also a way to inject custom JavaScript and CSS into your forms. The other possibility is to customize the Forms\PFApplicationCustomCode.aspx file that is referenced in all forms of the application.
To define a button calling a controller action, you can use the following markup: XML <a onclick="SubmitForm(this);return false;" href="javascript:;" spinner="true" controller="Document" action="ArchiveDocument" currenturl="/Forms/MyApplication/MyContentType/42" buttonname="btnArchiveDocument"><i class="fa fa-check"></i> Archive Document</a> The SubmitForm function can be replaced by ConfirmAndSubmitForm if you want the user to confirm his action before executing it. |
If you are looking for a way to execute an action on multiple items, take a look at the following articles: